- June 22, 2022
- by Toby
- Calibration
Understanding the measurement terminology in it is one technique to quickly learn, implement the results in a calibration certificate, and grasp the majority of the calibration procedure.
In this article, the differences, correlations, and interpretations of the terms Accuracy, Tolerance, Error, and Uncertainty will be presented.
First, it is important to define these terms to give a better understanding.
As per JCGM 200 and 106: 2012, below are the actual definitions:
As per JCGM 200 and 106: 2012, below are the actual definitions:
- Accuracy: Closeness of agreement between a measured quantity value and a true quantity value of a measurand.
- Error or measurement error: Measured quantity value minus a reference quantity value.
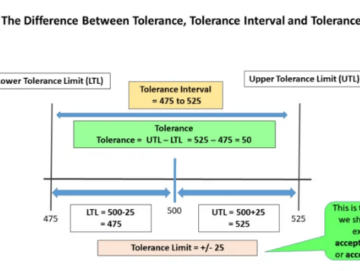
- Tolerance: Difference between upper and lower tolerance limits.
- Uncertainty or measurement uncertainty: Non-negative parameter characterizing the dispersion of the quantity values being attributed to a measurand
Accuracy:
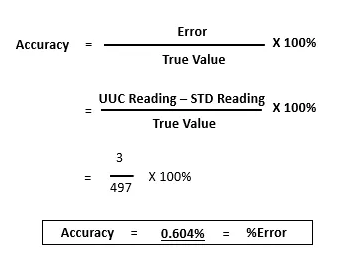
The accuracy of UUC results refers to how close they are to the STD (true) value. This ‘closeness’ is commonly expressed as a percentage value (percent) that can be converted to an error value and displayed in the same unit ( percent error). The closer the percentage value is to ZERO (0%), the more accurate it is.
Accuracy is more of a qualitative description, meaning it does not present a precise value.
A percent error is the same as accuracy ( percent error). This is where the error value will be applied.

Error:
The difference between the UUC and STD findings after calibration is called error. It uses the same unit as the parameter being measured.
Tolerance:
The difference between the UUC and STD findings after calibration is called error. It uses the same unit as the parameter being measured.
It is a range of values that is acceptable or permitted by the user from the result of the process or product measurement.
The permissible errors are as follows:
- Calculated based on the user’s process design.
- Regulatory organizations have mandated it (based on Accuracy Class)
- Specifications from the manufacturer (based on Accuracy)
Tolerance Limits are specified either by the manufacturer or by the procedure.
If we take a measurement, the tolerance limit value will inform us whether the measurement is acceptable or not.
Knowing the calibration tolerance limits will assist you in answering questions such as:
- How do you know if the result of your measurement is within the permissible range?
- Is the final product specification a success or a failure?
- Do we need to make any adjustments?
“The greater the tolerance interval, the more products or measurements will pass or be approved.”

Uncertainty:
Uncertainty in measurement is defined as the quantification of doubt. There is always a doubt that exists, an error included in the final result that we do not know, therefore, there are no perfectly exact measurement results,
Why do we have uncertainty or doubt in our measurement?
Some of the main reasons why we have doubt or uncertainty in measurements are:
- Inadequate knowledge of the Effects of the environmental conditions on the measurement.
- Personal bias in reading analog instruments, an example is the resolution or smallest value that you can read.
- Inexact values of measurement standards and reference materials.
- Approximations and assumptions incorporated in the measurement method and procedure.
- Variations in repeated observations of the measurand under apparently identical conditions – Repeatability.
Because we are unaware of the error that has been introduced into our measurement results, we are unable to remove or correct it.
Since we cannot correct it, all we can do is determine or estimate the range within which the true value exists; this range of true value is the measurement uncertainty result.

When it comes to decision-making regarding the results of our measurements, these are the terms that we need to understand.
Call us to discuss your calibration and repair needs at:
713.944.3139.


